AI workflows for designers are emerging to radically amplify productivity rather than replace human roles. The best designers are leveraging AI to build systems that make them significantly more efficient.
The panic around AI replacing designers has quieted down. The truth is emerging: AI workflows for designers aren’t about replacement, they’re about radical amplification. The best designers today aren’t competing with AI; they’re building systems that make them 10x more productive. They’re using AI as a design partner, a production accelerator, and a creative multiplier that handles the grunt work while they focus on strategy, craft, and the human insight that machines can’t replicate.
The difference between designers who thrive with AI and those who struggle isn’t talent, it’s workflow. While some designers are still manually creating variations or writing microcopy from scratch, others have built AI design pipelines that generate options in seconds, validate accessibility automatically, and ship polished work in a fraction of the time. This article breaks down exactly how to build those systems, with real prompts, templates, and anti-patterns to avoid.
Whether you’re designing interfaces, brands, or digital experiences, this guide will show you how to integrate AI into every stage of your design process, from initial concepts to production-ready assets.
The AI-Augmented Design Workflow (End-to-End)
Understanding the Modern AI Design Pipeline
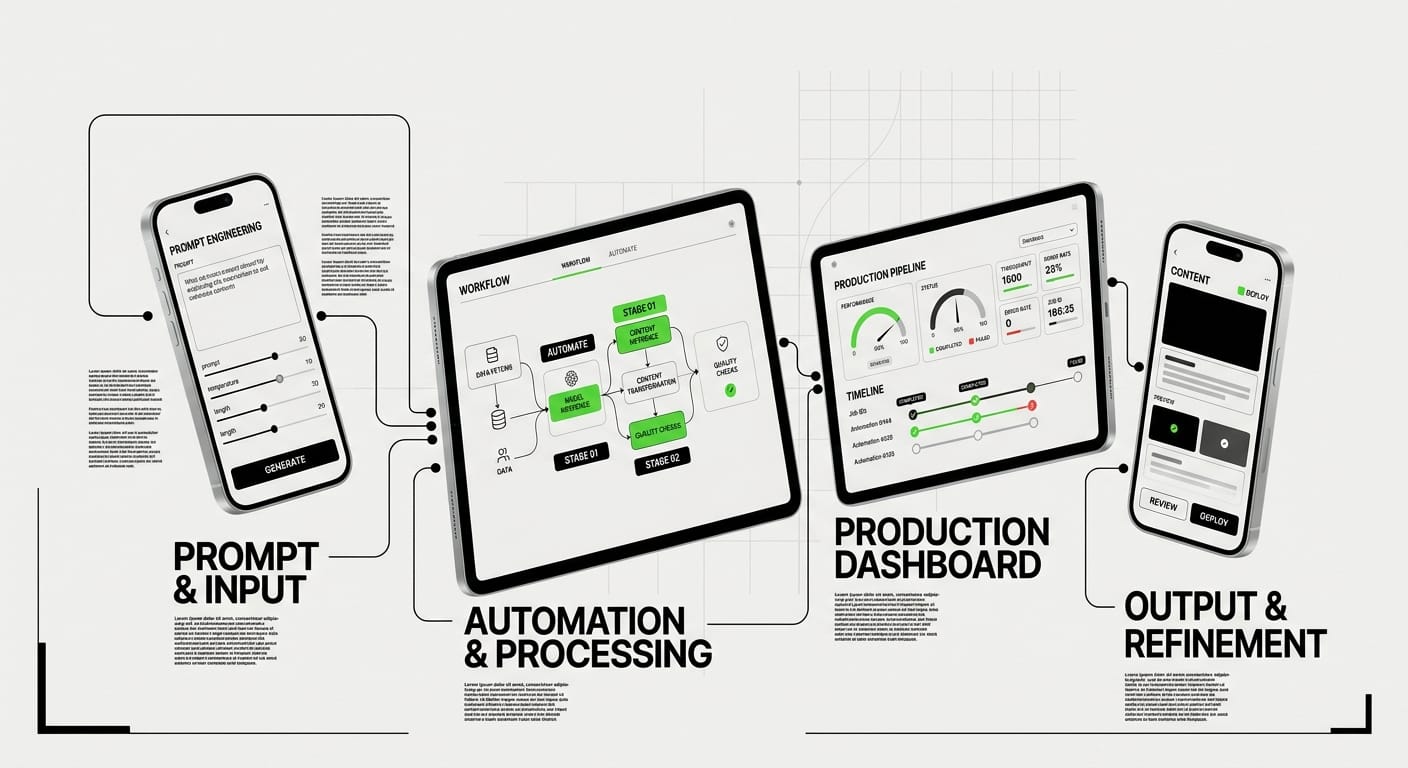
A complete AI design workflow isn’t about replacing your process, it’s about inserting intelligent automation at strategic points. The modern pipeline looks like this: Research & Inspiration → Concept Generation → Iteration & Refinement → Production & Handoff → QA & Accessibility. AI can accelerate each stage without compromising quality.
Instead of spending hours on Pinterest or searching stock libraries, AI can generate visual directions in minutes. Instead of manually creating 12 button variations, you can generate, test, and refine them systematically. The key is knowing which tools to use where, and how to maintain creative control throughout.
Mapping AI Tools to Design Stages
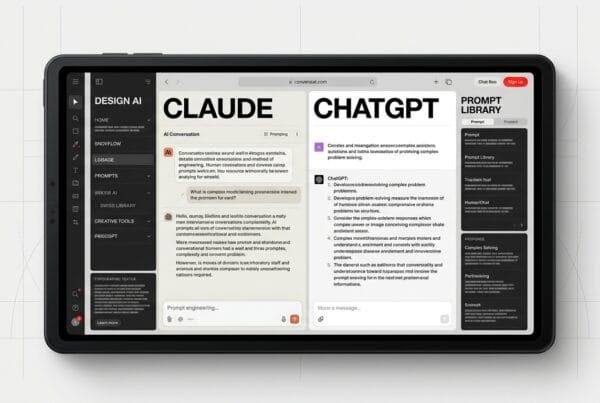
Early-stage exploration benefits from generative AI like Midjourney and ChatGPT for moodboards and concept sketches. Mid-stage design uses AI for copywriting (ChatGPT, Claude, Copy.ai), component generation (Figma plugins like Magician), and asset creation (Midjourney, DALL-E, Adobe Firefly). Late-stage production use AI for accessibility audits (Stark AI), design QA (Attention Insight), and automated asset export.
The trap most designers fall into is trying to use AI for everything at once. Start with one bottleneck in your workflow, usually repetitive tasks or writing, and build from there. Master one AI integration before adding another.
The Feedback Loop: Human + AI Collaboration
The most powerful AI design workflows aren’t linear, they’re iterative loops where AI generates options, you select and refine, then AI accelerates the next iteration. This designer AI prompts approach means you’re always in the director’s seat. AI proposes, you dispose. AI executes, you elevate.
Think of AI as a junior designer who’s incredibly fast but needs clear direction. Your job is to provide that direction through precise prompts, then curate and refine the output. This collaboration model is what separates 10x designers from those who struggle with AI tools.
Prompt Engineering for Visual Design (Midjourney, DALL-E, Firefly)
Anatomy of a Great Visual Design Prompt
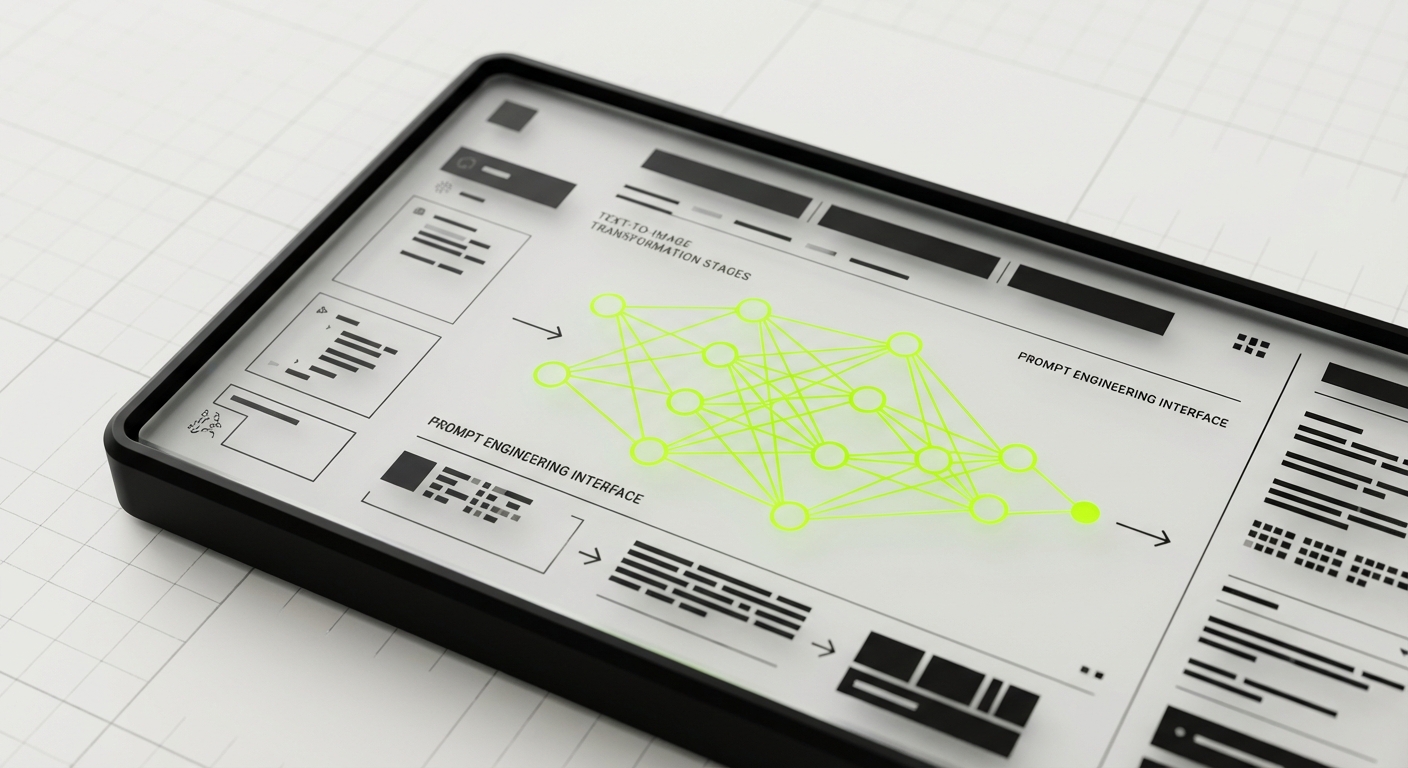
Prompt engineering for design is a learnable skill, not magic. Great visual prompts have four components: Subject (what you want), Style (aesthetic direction), Technical specs (composition, lighting, camera), and Quality modifiers (–stylize, –quality flags). Each piece narrows the possibility space and guides the AI toward your vision.
Bad prompt: “modern website hero image”
Good prompt: “Hero section illustration showing digital collaboration, flat design style, purple and blue gradient color palette, geometric shapes, white background, vector art style, clean composition –ar 16:9 –stylize 750”
The difference is specificity. The more precisely you describe what you want, and crucially, what you don’t want, the better your results. Start broad for exploration, then get specific for execution.
Prompt Templates for Common Design Assets
Logo concept exploration:
[brand name] logo concept, [industry], [style: minimalist/vintage/tech], [iconography: abstract/letterform/mascot], vector, clean lines, [color scheme], white background –v 6UI component inspiration:
[component type: button/card/nav] design, [style: neumorphic/glassmorphism/flat], modern UI, [color palette], high contrast, Figma screenshot style, clean composition –ar 16:9Marketing visual:
[concept: collaboration/growth/innovation], abstract illustration, [color palette], [geometric/organic shapes], professional, [background: gradient/solid/transparent], editorial style –ar 4:3 –stylize 500Moodboard generation:
[project theme] moodboard, [aesthetic: brutalist/organic/futuristic], design inspiration, color palette showcase, typography samples, [medium: digital/print/3D], curated grid layout –ar 3:2Copy these templates and customize the bracketed sections for your projects. Save successful prompts in a personal prompt library for reuse.
Iterating and Refining Visual Output
The first generation is never the final asset, it’s a starting point. Use Midjourney’s remix mode and vary region to refine specific areas. In DALL-E, use the outpainting and inpainting tools to expand or modify sections. In Firefly, use generative fill for precise adjustments.
Your iteration strategy should be systematic: Generate 4-6 variations first (explore the space), identify the strongest direction (narrow focus), then iterate on that direction only (refine execution). This prevents endless generation and keeps you focused on shipping.
From AI Output to Production Asset
Raw AI generations need post-processing for professional work. Upscale images (Topaz Gigapixel, Real-ESRGAN), clean up artifacts in Photoshop, adjust colors for brand consistency, and export in proper formats. AI in design process means AI handles generation; you handle refinement and polish.
For UI work, use AI output as inspiration or placeholder, then recreate in your design tool for pixel-perfect results. For marketing and brand work, AI can often produce near-final assets with minimal editing. Know the difference and adjust your workflow accordingly.
AI for UI Copywriting and Microcopy
Generating UX Copy That Actually Works
AI excels at writing functional UI copywriting, button labels, form field hints, error messages, tooltips, and empty states. The key is prompting for user context, not just clever copy. Include user goals, emotional state, and desired action in your prompts.
Template for button copy:
Write 5 CTA button labels for [action: sign up/purchase/download]. Context: [user situation]. Tone: [clear/playful/urgent]. Keep under 3 words. Focus on user benefit, not brand voice.
Template for error messages:
Write an error message for [error scenario]. User was trying to [user goal]. Tone: [helpful/apologetic], not technical. Include clear next action. 1-2 sentences max.
Template for empty states:
Write empty state copy for [screen: inbox/dashboard/gallery] when [reason: no data/first use/all cleared]. Tone: [encouraging/informative]. Include clear CTA. 2-3 short sentences.
These templates work because they focus on user context, not just aesthetics. Generic prompts produce generic copy. Specific scenarios produce specific solutions.
Microcopy That Guides Without Annoying
Great microcopy is invisible until you need it. AI can generate options quickly, but you must filter for clarity and concision. Prompt AI to write microcopy at specific reading levels (8th grade or lower), with specific word counts (under 10 words for tooltips, under 25 for hints).
Tooltip prompt:
Write a tooltip explaining [feature/icon]. User is [context: new user/power user]. Explain benefit, not mechanics. Under 10 words. No jargon.
Form hint prompt:
Write a hint for [form field: password/email/phone]. Tell user [requirement/format]. Tone: helpful, not bossy. One sentence.
Generate 10 options, pick the top 3, combine the best parts, then test with real users. AI accelerates generation; human judgment ensures quality.
Voice and Tone Consistency Across Interfaces
To maintain consistent brand voice, create a voice and tone prompt prefix you can prepend to all copywriting tasks. This acts like a brand guideline for AI.
Voice prefix template:
Brand voice: [adjectives: friendly/professional/witty]. Never use [words to avoid]. Always prioritize [value: clarity/personality/brevity]. Target audience: [demographic and psychographic].
Now write [specific task]…
Save this prefix and reuse it across all copy generation. Update it as your brand voice evolves. This single practice will dramatically improve consistency in your AI design workflow.
Localization and Accessibility in AI-Generated Copy
When generating copy for international users, prompt AI to “write in simple, easily translatable language. Avoid idioms, slang, and cultural references.” For accessibility, ask AI to “provide alt text suggestions” or “describe this visual for screen readers.”
Alt text prompt:
Write alt text for [image description]. Context: [where it appears]. Describe key information needed for understanding, not every detail. Under 125 characters.
Always review AI-generated accessibility copy with actual accessibility standards (WCAG) and test with screen readers when possible.
AI for Design QA and Accessibility Checks
Automated Accessibility Audits
Manual accessibility checking is tedious and error-prone. AI tools like Stark, Axe DevTools, and WAVE can scan designs and code for WCAG compliance automatically. But you can also use AI chatbots to review designs against accessibility principles before handoff.

Design accessibility review prompt:
Review this [screenshot/design file] for accessibility issues. Check: color contrast ratios (WCAG AA minimum), text sizing (16px+ for body), interactive element sizing (44x44px minimum), heading hierarchy, keyboard navigation paths, alt text requirements. List issues by severity.
Upload screenshots to Claude or GPT-4V and run this prompt. It won’t catch everything, but it catches obvious issues before they reach development.
Contrast and Color Checking with AI
Instead of manually checking every color combination, use AI to audit your color system upfront. Provide your brand colors and ask AI to calculate contrast ratios and flag problematic combinations.
Color accessibility prompt:
I have these brand colors: [hex codes]. Generate a contrast ratio matrix showing which combinations meet WCAG AA (4.5:1 text, 3:1 UI) and AAA (7:1 text, 4.5:1 UI). Flag problematic pairings and suggest adjustments.
Some designers use AI to generate entire accessible color systems from a primary brand color, ensuring accessibility from the start instead of fixing it later.
Component-Level Design QA
Before handing off designs, use AI to review component consistency, spacing, and visual hierarchy. This catches mistakes that are easy to miss after staring at designs for hours.
Component QA prompt:
Review this [component: button/card/form] design for: consistent spacing (8px grid), proper text hierarchy (size, weight, color), visual balance, alignment issues, inconsistent styling. Compare to [design system screenshot]. List discrepancies.
This is especially useful for large design files where manual QA would take hours. AI can spot inconsistencies across dozens of screens in seconds.
Usability Heuristic Evaluation
AI can perform heuristic evaluations based on Nielsen’s 10 Usability Heuristics or other frameworks. While not a replacement for user testing, it provides a quick sanity check before research.
Heuristic evaluation prompt:
Evaluate this [flow/screen] against Nielsen’s 10 Usability Heuristics. Identify violations for: visibility of system status, match between system and real world, user control and freedom, consistency and standards, error prevention, recognition rather than recall, flexibility and efficiency, aesthetic and minimalist design, error recovery, help and documentation. Rate severity (low/medium/high).
Use this for internal reviews and design critiques. It surfaces blind spots you might have missed.
Automating Repetitive Design Tasks
Batch Processing and Asset Generation
Designers waste hours on repetitive tasks: resizing images, exporting assets, creating variations, generating templates. AI design pipeline automation can eliminate most of this. Tools like Figma plugins (Automator, Scripter), Photoshop actions with AI, and custom scripts handle bulk operations.
Use cases for automation:
- Export icons in multiple sizes and formats (1x, 2x, 3x, SVG, PNG)
- Generate social media post templates from master designs
- Resize images while maintaining composition (AI-powered smart crop)
- Apply consistent color corrections across image sets
- Convert design tokens to code (CSS variables, Swift, Kotlin)
Start with your biggest time sink. If you export assets daily, automate that first. If you create similar layouts repeatedly, template that.
Template and Component Generation
Instead of manually creating every component variation, use AI to generate the permutations. Figma plugins like Magician can generate design variations from prompts. ChatGPT can generate component specifications you then build.
Component variation prompt:
I need a [component: button/card/input] with these variants: [states: default, hover, active, disabled, loading] × [sizes: small, medium, large] × [styles: primary, secondary, tertiary]. Generate a specification table with: dimensions, padding, font size, border radius, colors for each variant.
Build the system once from this spec, then reuse forever. This is particularly powerful for design system work.
Smart Placeholder Content Generation
Stop using “Lorem ipsum” or hunting for stock photos. Use AI to generate contextually appropriate placeholder content that makes designs more realistic during reviews.
Placeholder content prompt:
Generate realistic placeholder content for [context: e-commerce product listing/blog post preview/user profile]. Include: [titles, descriptions, names, dates, numbers] that make sense for [industry/audience]. Provide 10 variations.
For images, prompt Midjourney or DALL-E with: “photo-realistic [subject], appropriate for [context], diverse, professional, editorial style.”
Data Visualization and Chart Generation
Creating data visualizations from scratch is time-consuming. AI tools can generate charts, suggest visualization types, and even clean your data for presentation.
Data viz prompt:
I have this dataset: [paste data]. What visualization type best shows [insight you want to reveal]? Generate 3 options with rationale. Then create [specific chart type] with proper labels, accessible color palette, and clear hierarchy.
Tools like Julius AI and Claude with artifacts can generate interactive visualizations you can screenshot or export for presentations.
Building Your Personal AI Design Workflow
Auditing Your Current Workflow for AI Opportunities
Before adding AI everywhere, identify your bottlenecks. Track your time for one week and note which tasks take longest or feel most repetitive. These are your automation targets.
Common bottlenecks designers discover: writing first drafts of copy (AI can speed this 5x), generating variations (AI can do this instantly), finding reference images (AI can generate custom refs), formatting and exporting (AI can automate), accessibility checking (AI can audit automatically).
Prioritize bottlenecks by: (time saved) × (frequency) × (ease of implementation). Quick wins first, complex integrations later.
Choosing Your AI Tool Stack
You don’t need every AI tool. Start with a core stack: one text AI (ChatGPT/Claude), one image AI (Midjourney/DALL-E), one design plugin (Magician/Automator). Master these before adding more.
Starter AI design stack:
- Text/Copy: ChatGPT Plus or Claude Pro (versatile, multimodal)
- Visual: Midjourney (best quality) or DALL-E (Figma integrated)
- Design tool: Figma with Magician plugin or Automator
- Accessibility: Stark (free tier available)
- Optional: Notion AI or Mem for design documentation
As you identify specific needs, add specialized tools (Topaz for upscaling, Copy.ai for marketing, etc.). But start simple.
Creating Your Prompt Library and Templates
The real productivity multiplier is reusable prompts. Every time you write a prompt that works well, save it. Build a library organized by task type: visual design, copywriting, QA, research.
Prompt library structure:
/AI-Prompts
/Visual
- logo-concepts.txt
- ui-inspiration.txt
- moodboards.txt
/Copy
- cta-buttons.txt
- error-messages.txt
- microcopy.txt
/QA
- accessibility-audit.txt
- design-review.txt
Store this in Notion, Obsidian, or a simple folder. Include notes on what works and what doesn’t. Update prompts as you refine them. This library is your competitive advantage.
Measuring ROI and Iterating Your System
Track simple metrics: time saved per task, quality of output (1-5 scale), iterations needed (fewer is better). After one month, review: which AI integrations saved the most time? Which produced high-quality output? Double down on those. Cut tools that don’t deliver.
Your personal AI design workflow will evolve. The tools that work today might be obsolete in six months. Stay flexible, experiment regularly, but always measure results. Productivity theater (using AI because it’s cool) doesn’t count. Actual time saved and quality improved, that’s what matters.
AI Workflow Anti-Patterns
The “AI Will Do It All” Trap
Expecting AI to design entirely autonomously is the fastest path to mediocre work. AI generates options; designers make decisions. If you’re not heavily involved in prompt crafting, curation, and refinement, your output will look generic. AI amplifies your skills, it doesn’t replace them.
Anti-pattern: Generating 100 logo concepts and picking one.
Better pattern: Generate 20, identify 3 promising directions, iterate 5 times on each, combine the best elements.
Prompt Hoarding Without Testing
Saving prompts is smart. Saving prompts you’ve never tested is cargo cult productivity. Before adding a prompt to your library, run it at least 3 times on different projects. Verify it produces consistent, useful results. Quality over quantity.
Over-Automating Creative Decisions
Some tasks should be manual because they require human judgment: choosing visual directions, evaluating emotional resonance, understanding cultural context, making strategic tradeoffs. If you automate these, you become a production machine, not a designer.
Automate execution (resizing, exporting, formatting). Augment creation (generating options, writing first drafts). But never automate taste. That’s your job.
Ignoring AI Limitations and Bias
AI has blind spots: it struggles with hands, text rendering, and consistent character design. It has biases: default outputs skew Western, often lack diversity, and perpetuate stereotypes. Treat AI output as a draft, not a final product. Always review for accuracy, bias, and appropriateness.
Anti-pattern: Using AI-generated diverse team photos without checking for stereotypical representations.
Better pattern: Generate options, critically evaluate for authentic representation, edit or regenerate as needed.
Skipping the Human Review Layer
AI-generated copy needs human editing for tone, accuracy, and brand fit. AI-generated visuals need human refinement for polish and context. AI accessibility audits need human verification against actual standards. Always have a human review layer before shipping.
The fastest designers aren’t those who skip review, they’re those who make review efficient through systematic checklists and clear quality criteria.
Frequently Asked Questions
What’s the best AI tool for UI/UX designers starting out?
Start with ChatGPT Plus or Claude Pro for copywriting, ideation, and design documentation. These are the most versatile and immediately useful. Once comfortable, add Midjourney for visual exploration or Figma plugins like Magician for in-tool generation. Don’t overwhelm yourself with tools, master one category at a time.
How do I prevent AI-generated designs from looking generic?
Specificity in prompts is key. Generic prompts (“modern website”) produce generic outputs. Add unique constraints: your brand colors, specific style references (“in the style of [specific designer/studio]”), unusual combinations (“brutalist meets organic”), and technical details. Then heavily customize AI output, it’s a starting point, not the final product. Your taste and refinement is what makes it unique.
Can AI replace design systems and component libraries?
No, AI can help build design systems faster (generating variations, documentation, specs) but doesn’t replace the need for them. AI works best with systems: “Generate this component following our design system specs.” Systems provide constraints that make AI output more consistent and useful. Think of AI as a tool that makes system creation and maintenance easier, not a replacement for systems thinking.
How do I maintain my design skills while using AI?
Use AI for speed and scale, not as a crutch. Deliberately practice core skills: sketching, typography, layout, color theory. Use AI to handle variations and execution, but do initial concepts manually to keep skills sharp. Set aside time for non-AI projects. The best AI-augmented designers are strong designers first, AI amplifies existing skills, it doesn’t create them.
Is prompt engineering a skill worth learning deeply?
Yes, but with diminishing returns. Spend 20-40 hours building a solid prompt library and understanding prompt mechanics (specificity, structure, parameters). Beyond that, returns diminish, time is better spent on design skills. Prompt engineering is a multiplier skill: 10% effort yields 80% of the benefit. Don’t fall into the trap of endlessly optimizing prompts instead of actually designing.
How do I handle AI ethics and disclosure in client work?
Be transparent: if client deliverables contain AI-generated elements, disclose it upfront and clarify your role (direction, refinement, integration). Ensure you have rights to use and modify AI output commercially (check tool ToS). Never use AI-generated content that could contain bias, inaccuracy, or inappropriate content without thorough review. When in doubt, default to transparency.
What’s the future of AI in design workflows?
Expect tighter integration with design tools (Figma, Adobe), real-time AI assistance (copilots that suggest as you work), and multimodal AI (voice + visual prompts). The competitive advantage will shift from “using AI” (everyone will) to “using AI strategically”, knowing when to use it, when to go manual, and how to combine both for maximum use. Invest in fundamentals (design thinking, user empathy, taste) and treat AI as an evolving toolset, not a replacement for craft.
Conclusion
AI workflows for designers aren’t optional anymore, they’re a competitive necessity. But the designers winning with AI aren’t the ones chasing every new tool. They’re the ones who’ve systematically identified bottlenecks, integrated AI at strategic points, built reusable prompt libraries, and maintained rigorous quality standards.
Start small: pick one repetitive task this week and automate it with AI. Next week, tackle another. In three months, you’ll have a personalized AI design pipeline that saves hours daily and produces better work. The future of design isn’t human or AI, it’s human and AI, working in tight collaboration.
The designers who thrive in the next decade will be those who master this collaboration first. Build your workflow, refine your prompts, measure your results, and iterate. Your 10x productivity multiplier isn’t some distant future, it’s available right now. The only question is: when do you start?
Ready to transform your design workflow? Explore our UX/UI design services to see how we’re using modern AI workflows to deliver exceptional results for our clients. Or book a consultation to discuss how AI-augmented design can accelerate your next project.